I’ve always had a problem with wrap around lighting. I use it, but the explanations I read of it don’t explain to me what it is.
For the anal retentive among us, it doesn’t make sense; after all, light travels in straight lines, doesn’t it? How could it possibly wrap around anything?
This article will demystify the concept of “wrap around lighting” and explain why it’s not as crazy as it first sounds. By the end, you’ll understand why this term is so widely used in photography and how to use it in your work.
The Science of Light: Straight Lines, Diffusion, and Shadow Transition
Before we dig into the concept, let’s clarify one thing: light does travel in straight lines. Even though I was in school when I was taught this, it still applies. It is a fundamental principle of physics, and there’s no magic happening when we describe light as “wrapping around” something. Instead, what photographers are referring to is how light interacts with a subject and its surroundings, creating an effect that appears as though light is wrapping.
Wrap Around Lighting defined
At its core, “wrap around lighting” describes soft, diffused light that illuminates a subject gradually from multiple angles. This creates smooth transitions from highlights to shadows. Unlike harsh lighting (such as direct sunlight), which creates sharp edges and deep shadows, wrap around light feels gentle, natural, and more evenly spread.

How Does Light “Wrap” Around a Subject?
While light itself doesn’t bend or curve around an object, the term “wrap” refers to how the light appears to ‘curve’ due to its distribution. This effect happens for two primary reasons:
- The Size of the Light Source
- A large light source, relative to the subject, will produce soft, even illumination.
- The larger the source, the more directions the light will emanate from. As a result, the light hits the subject from many angles, “filling in” the shadows and creating a smooth gradient of light that appears to wrap around the subject.
- Distance Between Light and Subject
- The closer the light source is to your subject, the larger it appears relative to that subject.
- As the source grows in perceived size, light coming from multiple angles will soften the shadows.
A Visual Example: Bouncing Light off a White Wall
The normal way to make a large light source is to use a large softbox, but I don’t have one of those (come on, Santa… I’m waiting). Instead I use a convenient white wall.

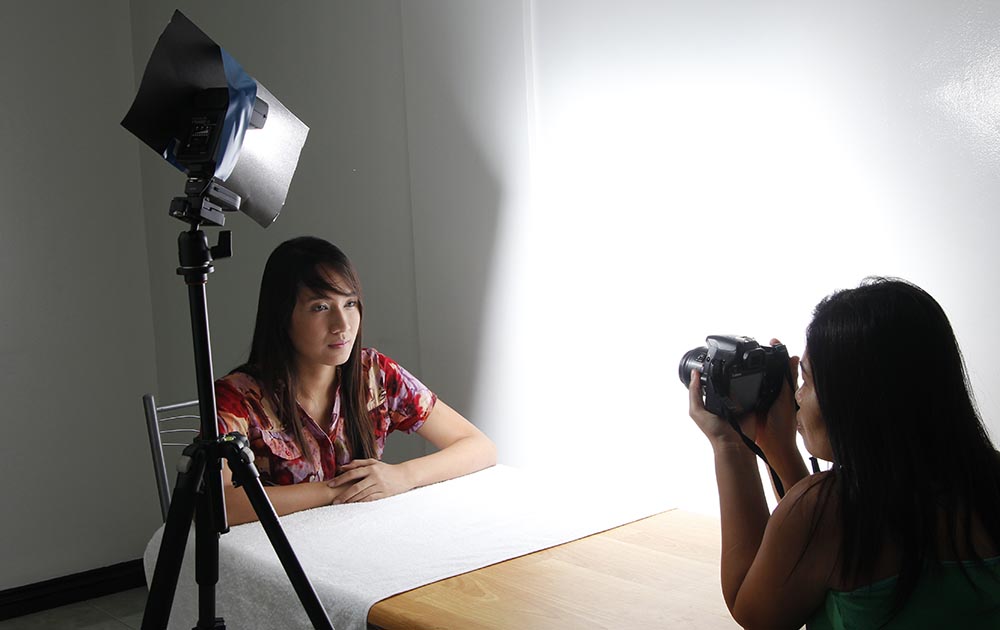
The small portable flash is pointed at the wall, and the model is placed relatively close to this wall. I placed the black card on the flash as a gobo to ensure she wasn’t illuminated by direct flash. Her only illumination comes from the light reflected off the wall. The wall has become my light modifier.
The ‘hot spot’ for the flash, i.e. the bright light, hits the wall a little way in front of her face; you can see the gobo has caught most of the side light.
The Flash Gun is No Longer The Light Source
This is a very simple concept to grasp, but it took one throwaway line from an old YouTube video to allow that penny to drop for me. The light that hits the model comes from the wall, so the wall is the light source. I now effectively have a 1 meter wide light source.
The Set up For The Shot
As I was experimenting, the first thing I wanted to do was set the light. Moving the furniture away and placing the table against the wall gave me by studio and a target height for the flash to aim for. The distance of flash-to-wall was determined by the available width of the room – if I could have moved it back further, I would have.
I kept the chair position a few meters away from the wall behind the model, because I didn’t want it too bright.
I had already placed a white towel on the table to help bounce some light from below because, well, it couldn’t do any harm.
I fine-tuned the flash and gobo so there would be light on the wall to her side – to brighten her hair.
I set the camera to ISO100, shutter to the flash sync speed, and aperture as wide as the lens would allow. The exact numbers didn’t matter as I would adjust the flash output to get the proper exposure.
Taking the Shot
With a wireless trigger attached to the flash and the camera, I was ready to start. I sat at the other end of the table, which was further than the minimum focus distance of the lens – so focusing was not an issue. Then I started shooting and adjusted the flash output according to whether the image was over or under exposed. I repeated this until I got the bright side of the model’s face at the correct exposure – and I let the rest of the photo take care of itself.
Analysis of The Wrap Around Lighting Shot
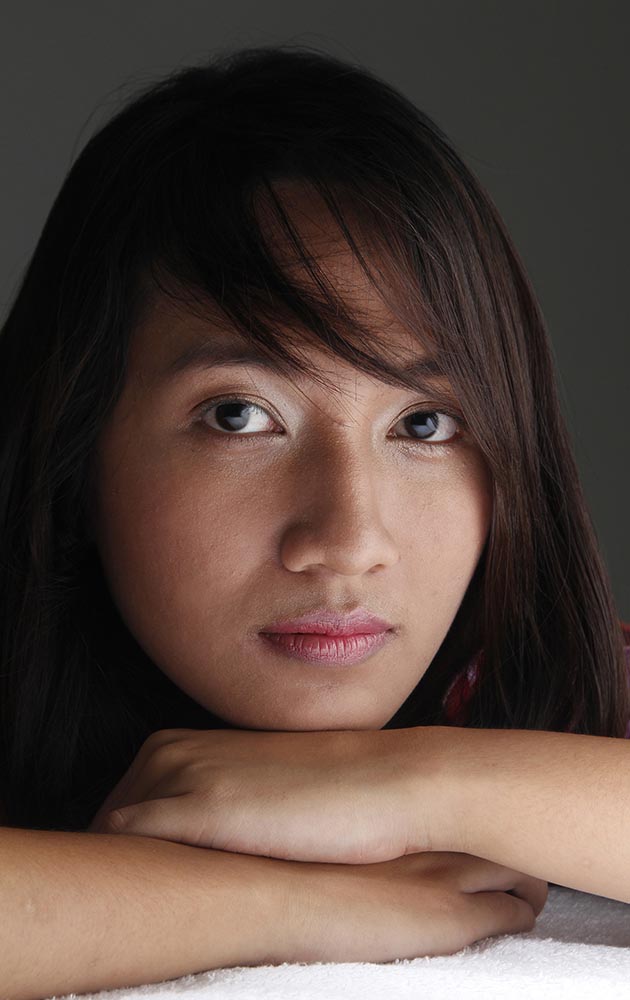
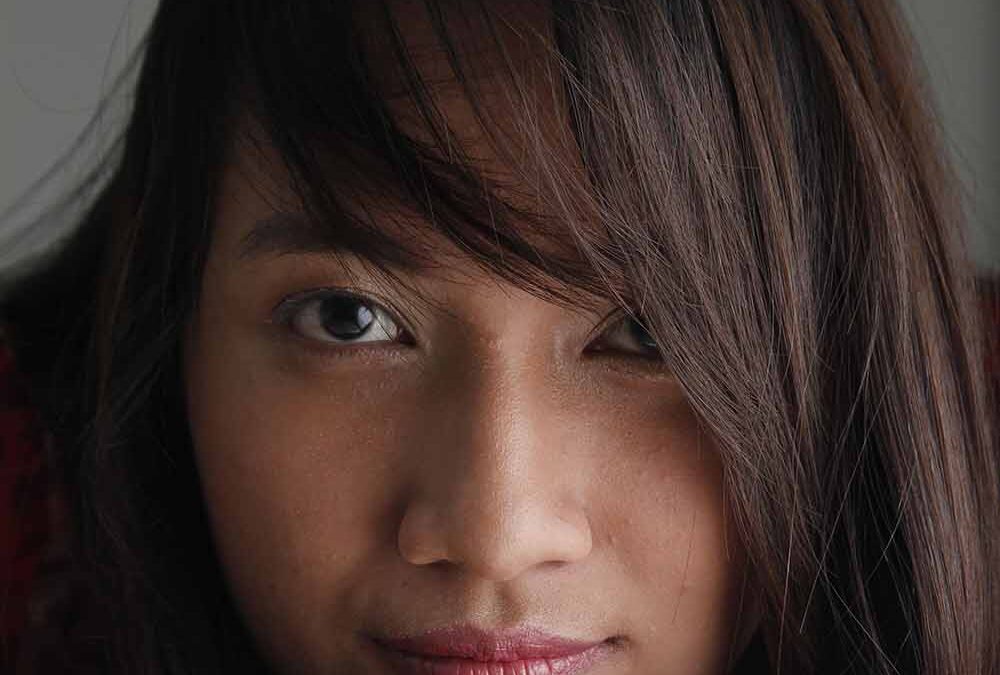
I always do an analysis of my shots to see what I did right as well as what I did wrong. In this shot, I like how her hair is quite bright without the shininess of a hair light. The light spilled on to the wall behind her, making it a greyish tone. This is much better than just a black background, which I would have gotten if I had killed all light on the rear wall. If I wanted the background to be brighter, I could have added a second flash unit, or simply moved the table closer to the rear wall and set everything up again as before.
If you look at the catchlights in her eyes you can see the wall and towel as the two light sources on the shot.
If I had wanted to throw more light on to the darker side of her face, I could have simply asked her to turn her head towards the wall slightly, but in truth I didn’t see that until the next day.
I think I would also have raised the flash head higher and removed the towel to get some shadow detail under her nose, but again, that’s for another time.
Why Does This Matter in Photography?
Understanding wrap around lighting can completely transform your photography. It’s particularly useful in portraits, where harsh shadows can exaggerate facial features or create an unflattering look. Soft, gradual lighting helps:
- Smooth skin tones and reduce unwanted texture.
- Emphasize natural curves and contours.
- Create a pleasing, professional, and natural result.
Wrap around lighting is also ideal for product photography, as it highlights the shape and form of objects in an elegant way.
How to Achieve Wrap Around Lighting
Now that you understand the concept, here’s an overview of how to create the effect:
- Use a Large Light Source
- Softboxes, umbrellas, diffusers, or even large windows on an overcast day all work well.
- Bring the Light Close to Your Subject
- The closer the light source, the softer and more “wrapped” the light will appear.
- Diffuse the Light
- Use diffusion materials to scatter the light and avoid harsh shadows. Options include translucent fabric, frosted glass, or diffusion panels.
- Experiment with Angles
- Position the light source slightly to the side, above, or even at an angle where you want soft shadows to form.
- Fill in Shadows
- Reflectors can help bounce light back onto the subject, further softening the transitions.
- Reflectors can help bounce light back onto the subject, further softening the transitions.
Conclusion: Wrapping It All Up
The term “wrap around lighting” may sound like a contradiction at first, but it’s a practical way to describe how soft, diffused light interacts with a subject. Light doesn’t actually curve around objects, but when you use large, diffused light sources close to your subject, the result is a soft, gradual illumination that appears to wrap around.
By understanding this concept and implementing it in your work, you’ll be able to create stunning, professional-quality photos that highlight your subject’s best features. Whether you’re photographing people, products, or still life, mastering wrap around lighting will elevate your images to the next level.
Now that you know the science behind the term, go experiment! Grab a softbox (or a convenient wall), position it close to your subject, and see the magic of wrap around lighting for yourself.
